Modo Tip: Optimize Animation Renders for Previews
I spend a lot of time working back and forth with clients to review animations. Â Many of these 3D animations are minutes long so the thousands of frames can take an enormous time to render without a powerful render farm. Â In modo, I typically have all my texturing and rendering quality cranked up to provide final quality screenshots and samples, but there is no fast way to get an animation output done easily. Â I’ve done through several different methods, with varying success.
OpenGL Previews
This worked fine in 32bit modo since you can control the codec and screen resolution of the animation output. Â Unfortunately however, the codecs used are not supported yet in 64bit (or implemented, I’m not sure) and the output in 64bit is a fixed resolution to a horrible quality wmv file. Â The scene sizes I have prevent me from using loading my animation in 32bit mode so I can’t take advantage of the better output options anymore.
Screen Capture
Real time screen capture is also been an option but again, the shear size of these projects makes it tough to get great openGL performance while capturing. Â I am often having to display bounding box for complex geometry as the 30MM+ polys just can’t run at real time speeds and the choppy output is really not usable for the purposes of reviewing smooth animation output.
Rendering Output
So, I’ve had to resort to rendering outputs. The classic approach is to reduce the resolution and anti aliasing or motion blur to get a faster render output. While this works to reduce render time it lowers the quality and is a lot worse for reviewing the animation. Â It does allow you render the output faster but at a big sacrifice.
Shader Tree Tip – For High Speed Previews
So, I’ve found the best method is to layer in some elements into the shader tree to simplify a render.
Add a Top Level Material
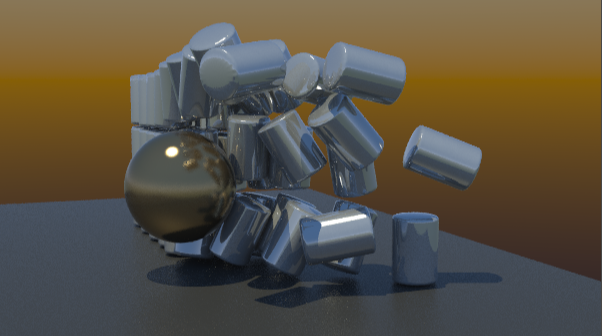
You can apply a base material at your top level that essentially overlays all other materials and shaders to get a simple fast rendered output. Â This can give you a simple result with a clay/grey style of animation output. Something your clients may or may not appreciate.

A Better Solution is to Use a Top Level Material Mask
So, when you add a top level layer it will override everything below it. Â This is less than ideal as you lose all your material. Â However, some materials are just too costly to render when you need a preview animation done so it is better to have control of specific material properties. Â The ones that are costly to render like reflections, transparency, subsurface scattering and displacement. Â You can mask those away by setting your top level material to use a blend mode of “multiply”. Â The multiply mode being on top lets you set the properties you want to keep below intact to 100% or maximum value and the properties you want to block out can be set to ZERO. Â Anything set to zero will multiply against the value underneath it in the shader tree and essentially turn that channel off. Â So, setting reflections, transparency, subsurface to ZERO can keep all your other settings intact, while zeroing those to allow for some speedy renders. Â This can be much more effective than rendering smaller frames or lower AA if you want to show the best representative animation previews to your clients.

")