Ethereal 3D - 3D Graphics Home Page
Site Map of Ethereal 3D Contact Ethereal 3D Online Products Services and Rates Portfolio of Various 3D Graphics and Animation Work Free Tutorials Resources for Free Graphics and Graphic Creation Material

Wooden Canoe Tutorial image

Canoe

This articles was created from my postings on a community forum and was not created as a complete step by step tutorial. It does however, show the main steps needed to create the object and shows the progression and images along the way. Enjoy.

Step 1

You need to first create two outlines to help define the canoe's top edge and the side profile or hull bottom. This is shown with only one end of the canoe so we can use symmetry to our advantage later on.

These two curves can be created simply using the pen tool and then just making two point polys from the points and killing the main polygon or with the curve tools or purely manually point by point and create the poly string. The points should have similar spacing on each curve since we want to be able to patch (or sub-D) connect betwen these.


tutorial step 2

Step 2

Select the two edges by double clicking each one and then we will bridge between them to create the poly mesh outline of the canoe. The example shows 4 segments in the bridge using curve mode so that it patches the profile nicely between the two edges.

If you want to make some slight adjustments to the shape, you should use radial falloff (set to the same size as the full canoe and make some minor adjustments to the profile. This can be done later on just as easily so it is not that important at this stage.


tutorial step 3

Step 3

Next, the canoe needs to have some thickness in its walls, so select everything by double clicking a poly. Copy all to the clipboard, then flip the selected polygons (f key) and then scale everyone down by a few percent using the origin as the action center. This will provide some spacing between the walls. Then paste back in the clipboard (the outside surface)


Tutorial Step 4

Step 4

Now the upper edges need to be bridged so the inner and outer surfaces are connected. Select only the upper edges of both surfaces and then run the bridge tool with only ONE segment. You should end up with something like this.


Tutorial Step 5

Step 5

The edge of the canoe needs some detail added so select the new poly string between the edges you just bridged which are joining the two surfaces. Use the bevel (in grouped mode) to expand out, shift up, then shift up again. This should give you enough edges to weight for a detailed trim along the edge of the canoe.


Tutorial Step 6

Step 6

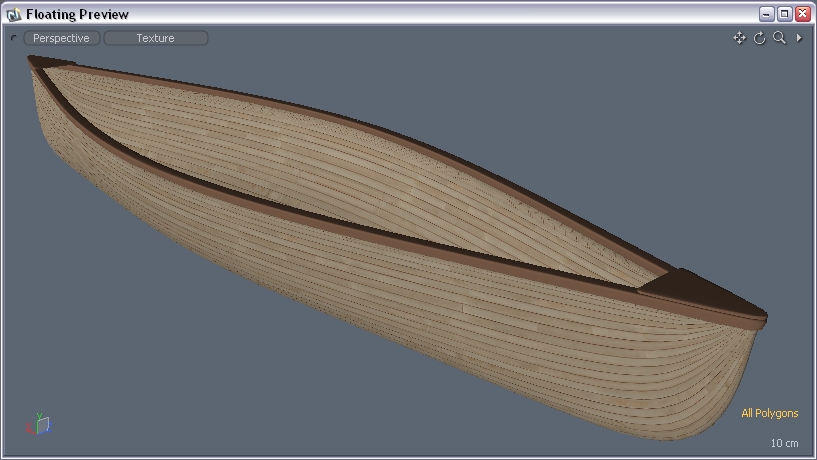
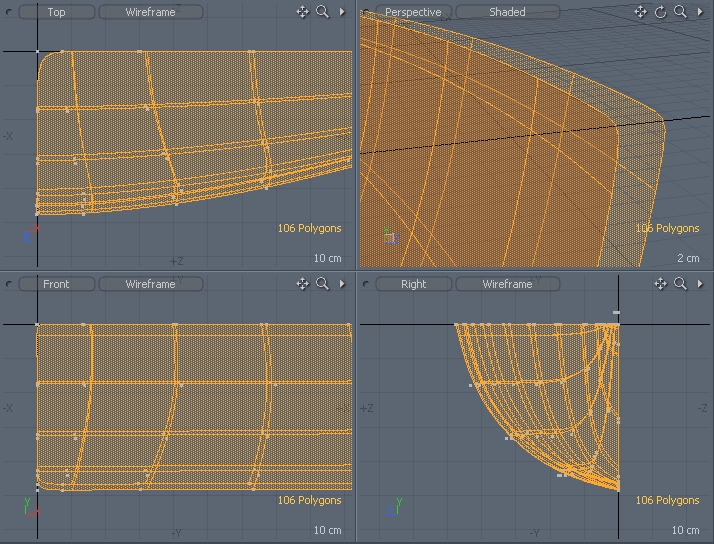
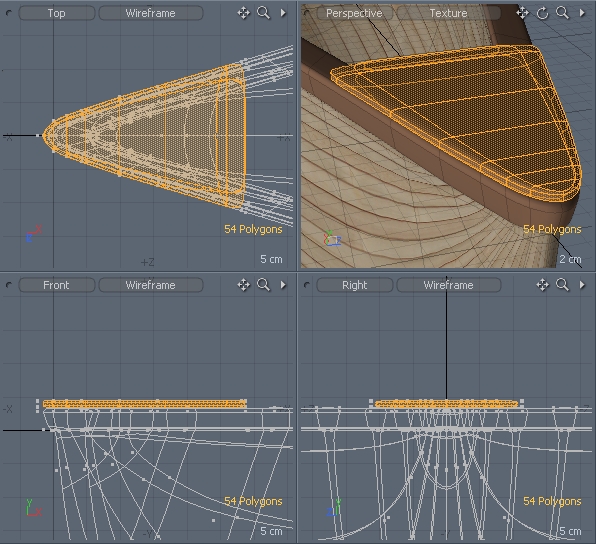
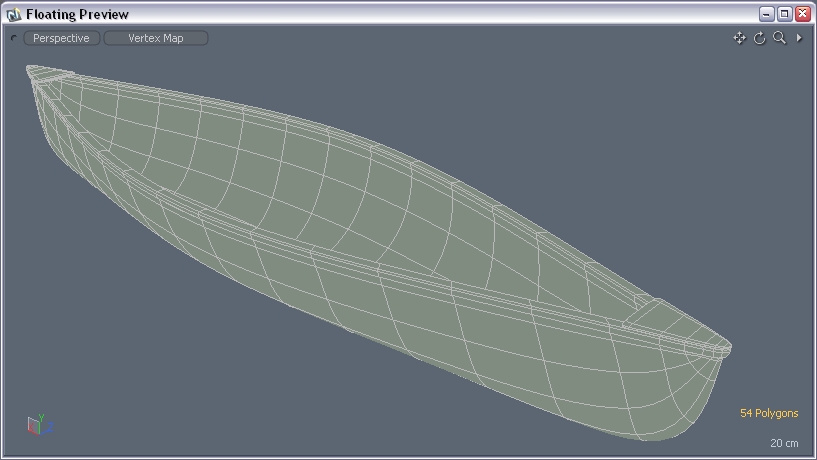
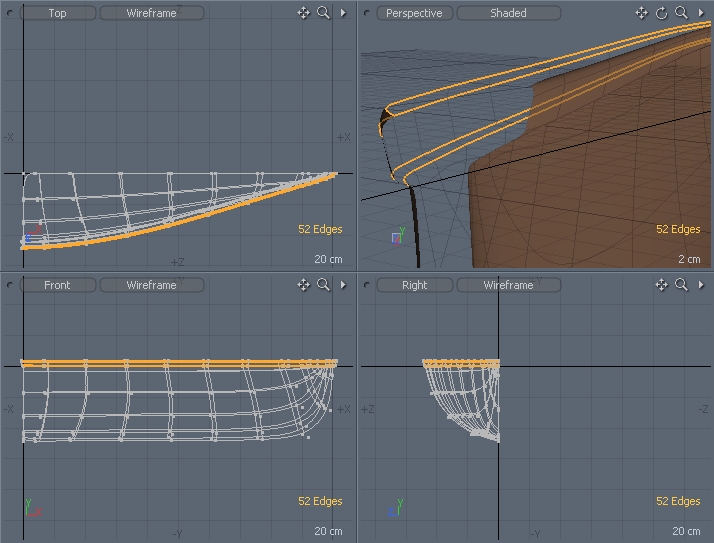
Switch to sub-D mode (hit TAB) to viewed the sub-D model. You may want to select the edges along the trim line now and add some weighted edges to them (active the subdivision weight map then hit W). Once you're happy with the trim shape you may want to just amke some minor tweaks to the rest of the mesh to help smooth out areas or reshape the canoe a little.


Tutorial Step 7

Step 7

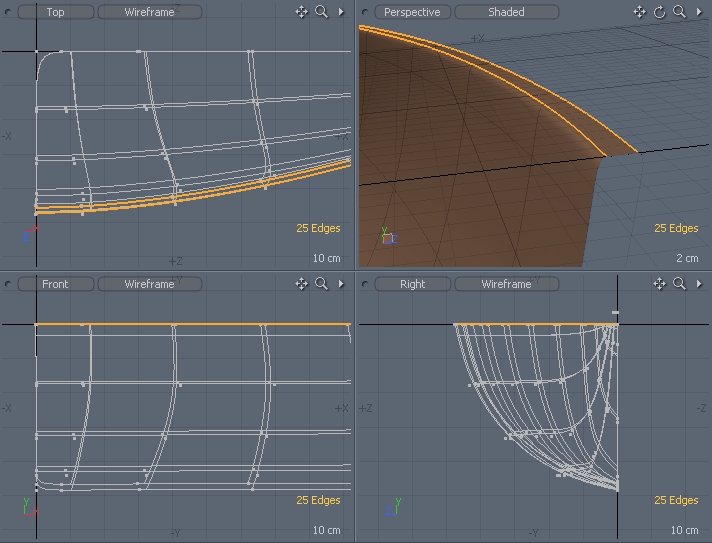
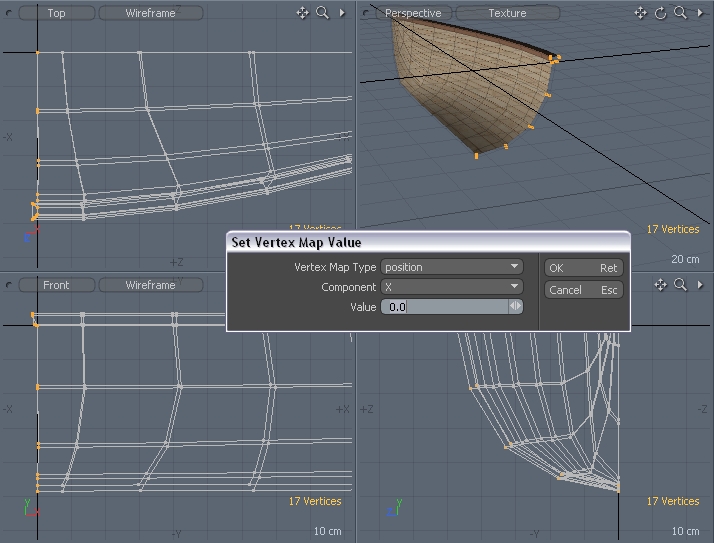
Next, we want to mirror the canoe but we need to ensure it will mirror nicely first. Select all the vertices along the Z-axis and set the Vertex map value (in the vertex menu) to 0.0 on the X component. Do the same for the points along the X axis but set their Z component to 0.0


Tutorial Step 8

Step 8

In order to help us texture the canoe using symetry in UV maps, we are going to prepare the UV maps before mirroring the geometry. However, we are also going to make the UV map bend along the end of the canoe which will be difficult to do by editing the UV map itself, however, it is fairly easy to alter the model first, then apply the UV coordinates to the morph map.

So, create a new vertex relative morph map called unwrapped.


Tutorial Step 9

Step 9

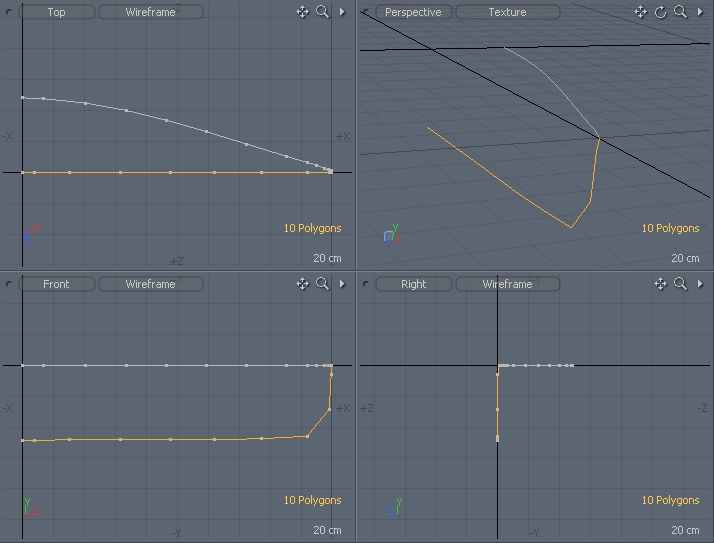
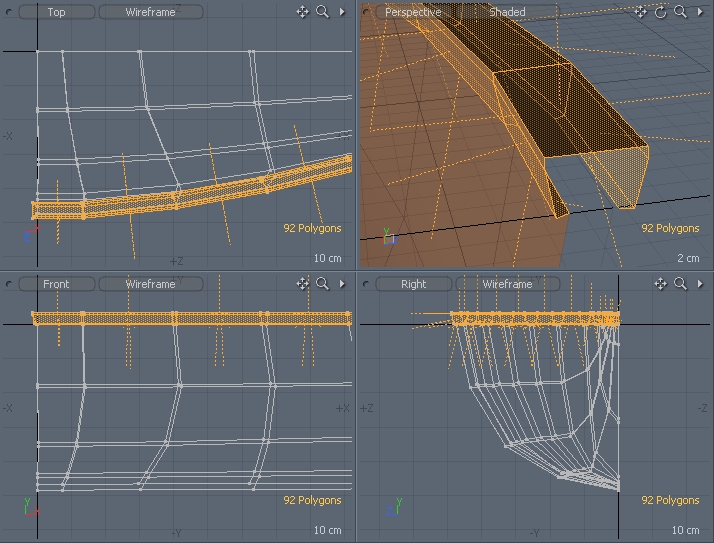
Then what we want to do, is straighten out the sub-D lines along the X axis so most of the bend is taken out by the morph. Only the end of the canoe has this problem and needs to be straightended out.

You may also need to change the vertical spacing of the sub-D lines so that there is a even spacing in the side profile as the actual area of each polygon row. In other words, the height between the horizontal edges, needs to be relative to the actual width on the canoe's polygons. This will allow a planar UV map to be applied to this new morph map.


Step 10

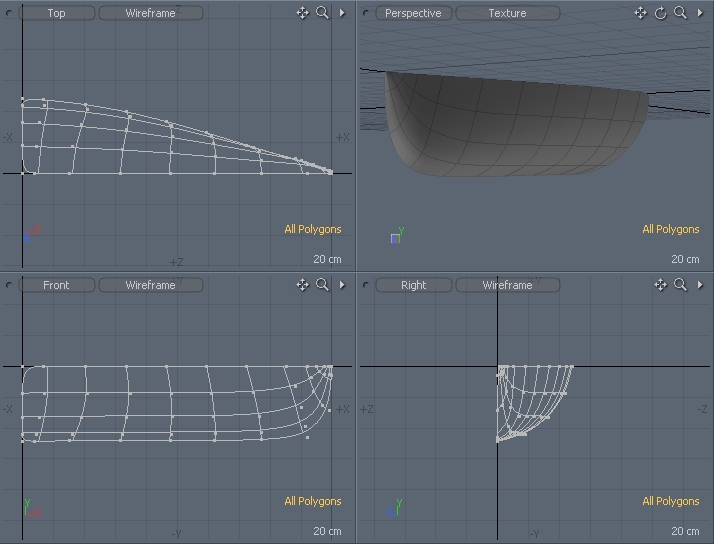
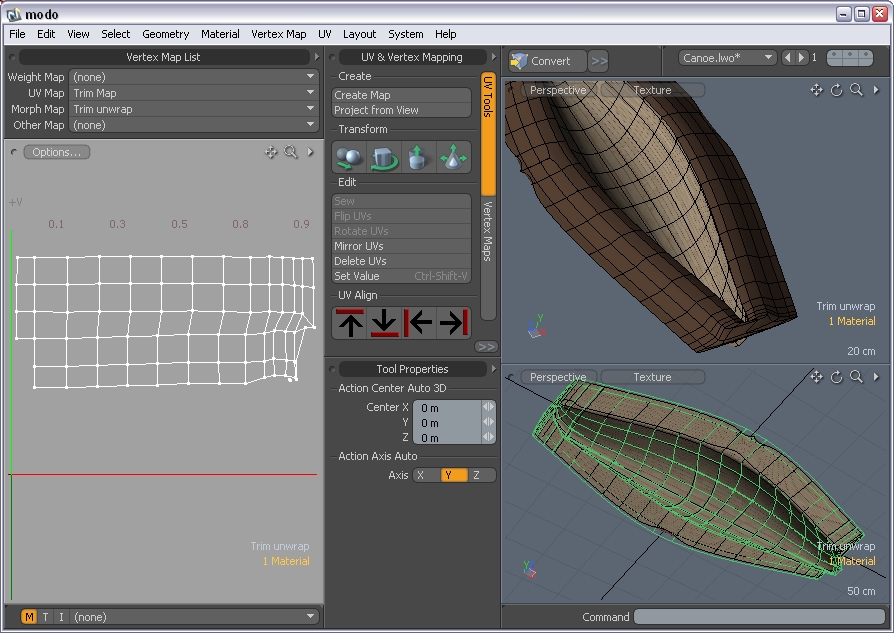
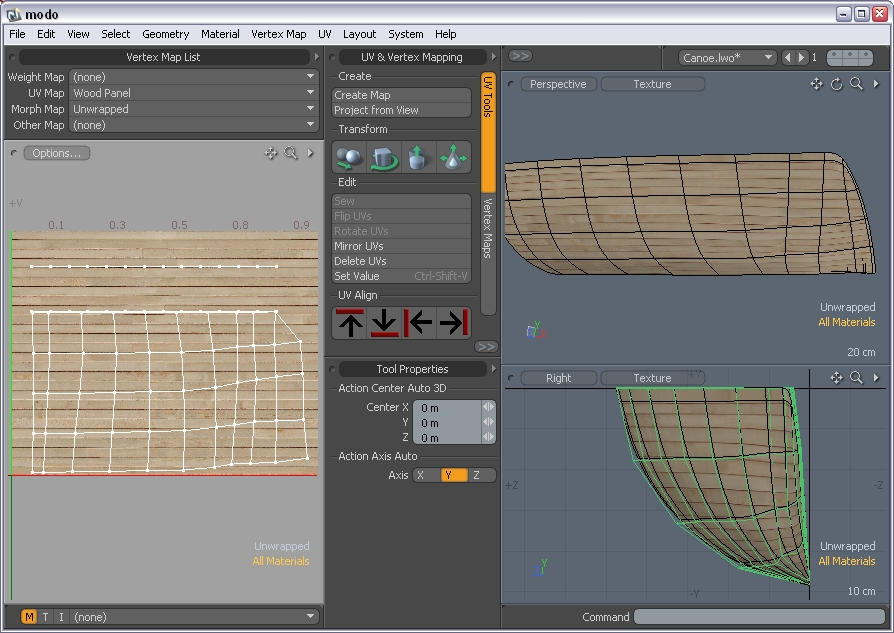
Switch to your UV editing layout and create a new UV map, named "Wood Panel" without any default values. Load in your favorite wood texture into the background of the UV map to help you space out the UV texture. We want to now create the UV coordinates to the canoe walls, but not the trim along the top edge. So, select all the side wall polys but not the bevelled trim edge, and then hit the Create Map button. The map applied should be a a simple planar Z-axis with all automatic settings. Apply it and you should have something like the following.

Now, with the UV coordinates applied to the morphed object, you can unselect the morph map named "unwrapped" and view the original object. You will need to apply the new UV texture to your canoe as a material. Do this by opeing the material editor (F4) and dragging the image of the wood you have loaded onto the canoe's material. This should apply it automatically as the UV map but if not, you can set its projection type and map name.

Tutorial Step 10


Tutorial Step 11

Step 11

You will now see how the texture fits the canoe in the 3D viewports. You should have your texture curving up the end of the canoe. You can tweak the UV map manually now to help smooth out any texture problems. Remember to view your model in Sub-D mode to see how the texture applies on the smoothed model.


Step 12

Finally, now that the UV texture is applied, we can mirror (Shift V) our canoe on both the X-axis and the Z-axis. Do this and join any unwelded vertices to clean up the mesh both on the inside of the canoe and the outside. Ensure that all the ends were properly closed up and the polys connected. You should have a nice looking canoe model now. You can do some additional shaping using the move tool with large radial falloffs to help expand out the base of the canoe.


Step 13

Another UV texture will be useful by creating it for the trim of the canoe. This can be done before or after you have mirrored the canoe, the example UV texture was made before mirroring but it should not make any difference. So, a vertex morph map is needed again to hlep unwrap the UV texture to make the complete surface of the bevelled wood trim to be flatteneed out for the texture application. This is easy to do on the model by selecting the edge loops in the wood trim and scaling it out away from the canoe to unwravel the wrapped trim surface so it is flattened out. Now, a new planar UV map can be added to this surface (make it a separate surface now) from the Y axis. This will create a UV map that is not rectangular, but this is very easy to fix now in the UV map itself by selecting rows of points and scaling them to line up or just by moving them point by point.

This rectangular map allows a texture to be applied that can have the wood texture mapped along it straight but will bend accurately around the canoe's edge.

Tutorial Step  13

Tutorial Step 14

Step 14

Last but not least are the minor details of the canoe such as the end braces, seats and portage brace. These can each be modelled fairly easily and added to the canoe since they are separate wood peices. The image below shows an example of one of the end braces which was created by copying the edges of the trim baord and manually created joining polys and then extruding it upwards several times to add edge detail.


Step 15 (Finally)

Finish the textures for the trim boards, and you should have yourself and decent looking canoe!!

Tutorial Step  15

Tutorial Step 15b

Site Map | Contact | Products | Services | Portfolio | Tutorials | Resources

Copyright © 2009 Ethereal 3D. All rights reserved.
Email: :: Phone : (403) 670-9921