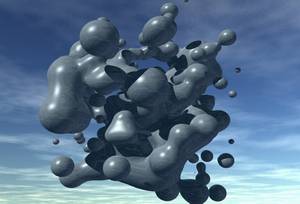
This is the scene(animated) we will create using Hypervoxels 3 in Lightwave6b.
 |
Create a default sized box with 5 segments on each axis. Select the top row of 25 points and copy them into the next layer and stick the box in the background layer. Move the 25 points down by 200 mm so that they line up with the next layer of points from the box in the background layer. Paste the top layer again and then repeat this until all five layers are filled with the 25 point array. You can also do this with the array tool, however, this is simple and we did this simply to have inner points inside the box area which don't exist when creating the default box. |
| Send your object into Layout and add a displacement map to the points you just created.
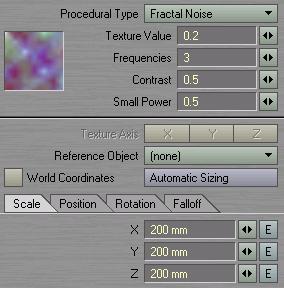
We want these things to move and using procedural textures to do this works great! Use a procedural fractal noise with defaults but change the scale to 200mm on each axis. Click envelope for the rotational value of the bank for the texture. Add a key at frame 2160 with a value of 360 degrees. This will make the texture rotate in 3D space at 6 frames per degree of rotation. Set your timeline length to a few hundred frames and you'll see your particles (may need them selected) moving about in a random pattern which now need to interact with each other. |
 |
 |
Open the Volumetrics Effects panel and add the Volumetric Hypervoxelsfilter and double click it to open its options window.
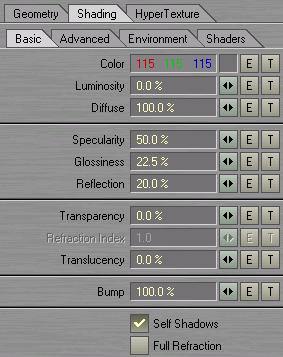
Select your cube points and activate them as hypervoxel particles. Set the object type to surface. Set the particle size to 130 mm. Size Variation to 200 % Choose your object color and surface settings. I used the settings shown to the left. On the environment tab, set to spherical reflection map and choose your favorite seamless reflection image. I used a water reflection image. |
OK, so now most of the particles are set up and interacting nicely with each other. But, we need to animate them so we need to set a particle size texture channel. So, on the geometry tab, click texture and set up a turbulence procedural texture with 3 frequencies, 0% contrast and 0.5 small power. Leave the size at 1m and create an envelope to rotate the textures heading to 360 degrees at frame 1080. This makes the texture rotate slowly in 3d so the particles will now change size as time elapses so that they are all interacting differently throughout the animation. If you activate the show particles option on the geometry tab, you can see the sizes change as well as the movement of the particles in the layout preview.
| Now, you need a decent background for your scene so you can create a simple one with the skytracer plugin under the image processing effects panel in layout. Open the panel and add the SkyTracer pixel filter. Adjust any of the settings to your liking and render the images and skytracer scene. I would suggest an image size of at least 1024 so that you have good resolution on your background maps. When it has saved your SkyTracer scene, Use LoadFromScene to include it in your current scene. Now you will have a nice background. I lower the Sky Cube Object and tilt my camera upwards at my particle system so that only the sky is visible without a horizon. | 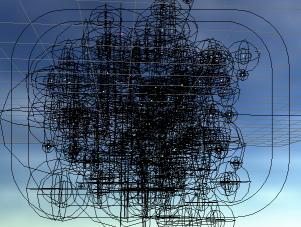 |
Adjust your lighting, animate your camera, and voila! A nice metaball, psychedelic animation.
Another idea that looks great (especially played as a screen saver) is to create your particle size rotation envelope and your displacement map rotation envelope so that they both wrap back to the original location and have a long looping animation.
I hoped this helped create some more ideas using hypervoxels as they are extremely powerfull and impressive.
|
Please check out Ethereal3D.com for more 3D services, animations, objects, and tutorials. |