Using Audio to Drive Particle Systems in MODO701
This is a guide to some of the methods I used to create the animated particle system shown above, it is not a full step by step tutorial for anyone to use. Â It should however, easily show you the steps used and some of the ways you can apply this same set of tools in your own animation projects.
Audio Edits
The first thing I did was to pick an audio clip so I could do some audio processing. Â I used several audio tools (from my video editor) to audacity to produce three separated audio tracks, each from the source track I selected. Â I created:
- a bass track that was a low pass filter below 400Hz
- a midrange for the vocals with a band pass filter from around 1KHz to 3Khz
- a treble track, high pass filtered above 5KHz
I added some smoothing and noise filters to get the audio with a bit more definition and not all noise so it would be more distinguished. Â This gave me separate audio to use in modo, which I imported in along with the original track. Â I also created one more smoothed audio track (which I called my cleaned track in the screenshot below)

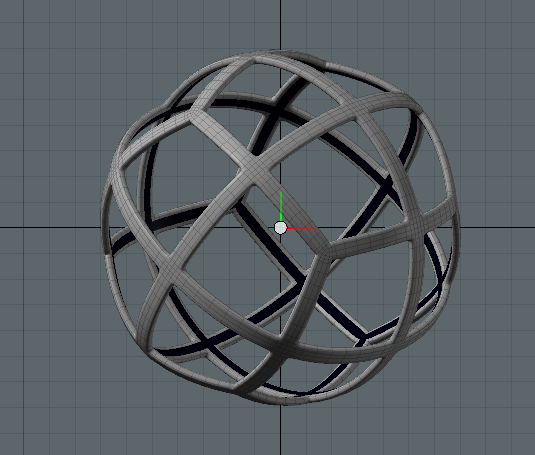
Next, I create a subD cage of what I wanted to use as the emitter source for my particle animation. Â I made this simply by subdividing a cube a couple times, selecting and beveling just the edges, then selecting the boundary of those edges, converting them to polys, deleting the unselected holes and then thickening and adding edges to give it some width.
Modeling
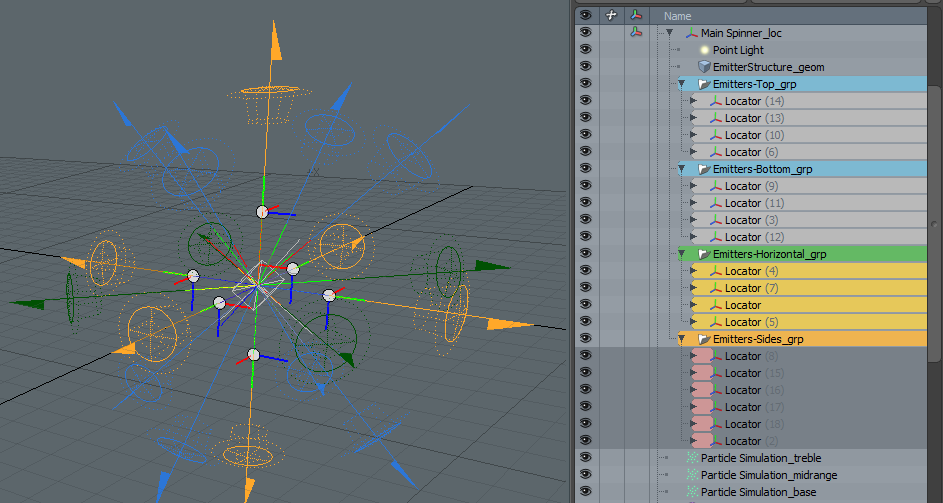
I had done some testing using different surface generators and determined that I did not have enough control over the particle emission from the surface, so I added a series of emitters for each of my audio tracks. I added them as children to a locator so I could easily keep things symmetrical. Â My midrange consisted of 4 emitters, all on the XZ plane around the sphere at its four sides. Â My treble I put four emitters all facing up at 45 degrees angle and offset by 45 degrees on the Y axis. Â I mirrored that hierarchy to have the same treble emitters out the bottom at 45 degrees so the midrange emitters. Â Then lastly, I put in some base emitters, 4 on the horizontal plane, 45 degrees from the midrange and one out the top and one out the bottom for more emphasis.
Setup
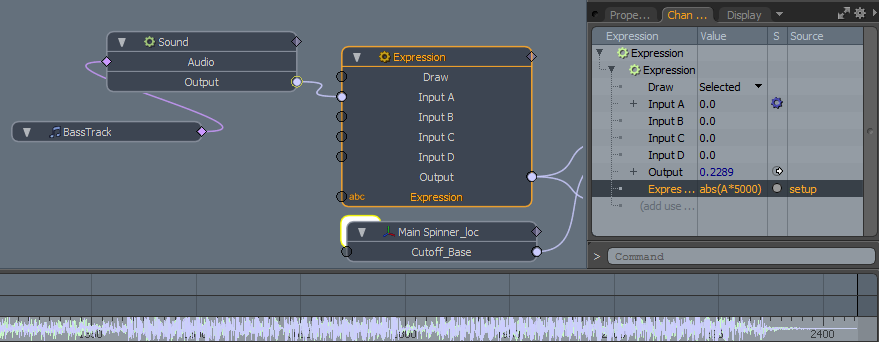
Next I started building my schematic with the audio track, starting with the base track. Â Here I wanted to easily control the output level and to capture an absolute value of the amplitude to get a more consistent particle stream (I’m not sure this is necessary) since I was seeing negative output values from the audio track.
Particle Schematics
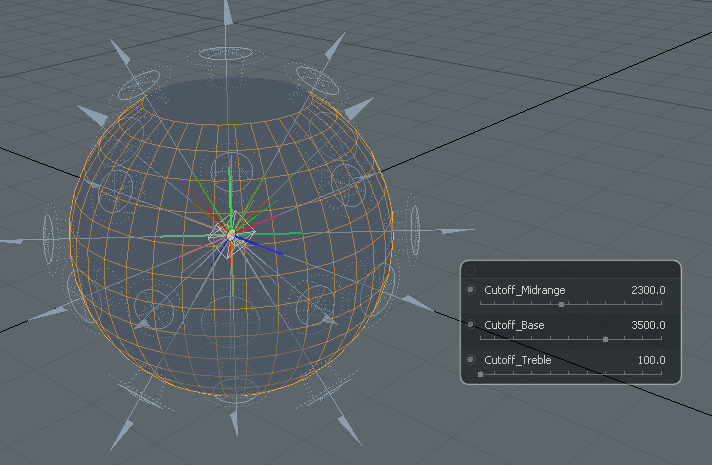
Next, I did some work to get better animation control of the audio tracks with some simple user channels. Â To my top level locator, I added cutoff_base, cutoff_midrange and cutoff_treble, each are used to control the amplitude cutoff point for each emitter so that they can easily be animated and controlled during the animation for when each track gets emphasized. Â I planned on putting only the vocals, then only some treble and then powering up the base in the portion of the track where this is obvious. Â The audio tracks I had still had enough base to be emitting, so these new user channels allow me to animate the cutoff amplitude. Â The cutoff is done with a channel modify using if greater than, and the user channel is in that comparison. Â You can see the settings I used here:

The rest of the particle system then needs to be driven by these audio channels and modifiers. Â I’ve connected mine up through my main locator (to a user channel) and then that locator channel drives each of the emitter rates on the base emitters. Â You can hook them up directly if you want as well, I just had this method to start from some previous key frame animation testing. Â You should have your base track all driving your particle system emitters now.
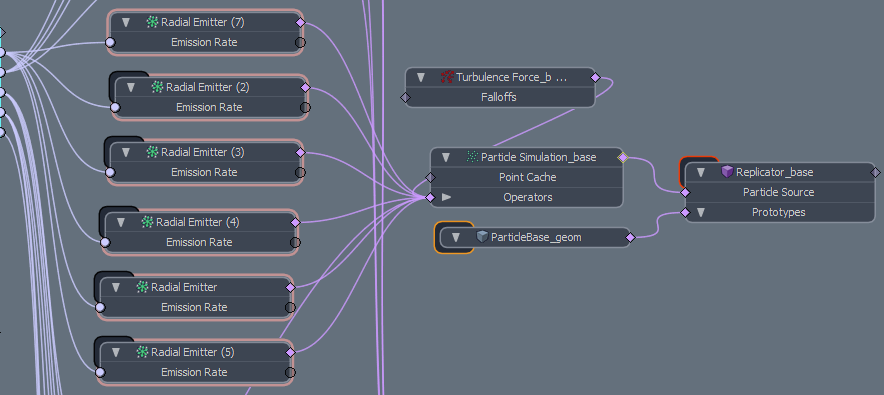
I had a replicator setup to visually the particles when I started this, but the final animation was all done with sprites rendering, which will be covered later in this article. Â You don’t have to hook that up, just make sure you feed your particle simulation for your base track. Â So, this same process needs to be done very similarly now for your midrange and treble tracks and you will end up with a large connected schematic to drive everything, but its mostly duplicates.
Animation
OK, you should have everything driven from your audio tracks, make sure you use the proper audio media track for each particle system and the emitters should each be connected to the appropriate particle simulation, since you should have one for each audio track (base, mid, treble). Â You can also see from my schematic that I had added the assembly, Scale by Age, to each particle system but this was not needed for the sprite rendering I used, it was needed when I activate the replicators and want those replicators to scale with age.
Also, the bottom left of my schematic view above, you can also see I had one more audio track connected to the intensity channel of my point source. Â You can either scale it up from the audio channel itself or add an expression modifier as I did to control the amplitude scaling, similar to the base track described above. Â So, I added a simple locator display to make the root locator easy to grab and channel haul for some animation setup. Â The user channels in it are for my cutoff amplitudes. Â This allows me to make my animation have easy to keyframe segments that emphasize different levels in base, mid and treble from the audio.
Then I setup my animation keyframes to test out different levels on the amplitudes to get the emission rates I wanted. Â My graph editor ended up with this kind curves for my three audio tracks.
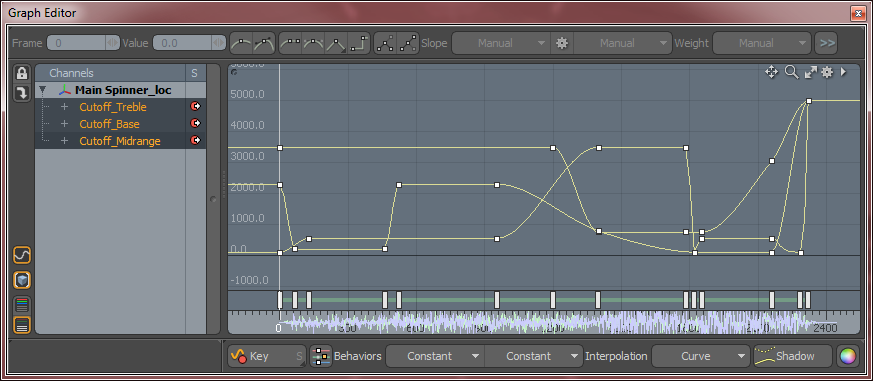
You can see the base starts out in the song with a very high cutoff for the amplitude so you don’t get any of the base emitting until late in the animation. Â The end shows how I cutoff the base and midrange earlier and then left a very steep cutoff for the treble which you see at the end of the animation ending on some high frequencies fading off from the emitters.
So, then I used the playback of modo’s audio timeline to scrub along, find points of interest and change the animation of the main emitter ball to move, rotate and scale to some of the beat changes and effects in the song. Â The spinning effects and size changes produce a nice particle effect since everything now follows the emitters. Â Here’s a quick view of the keyframing I did for the animation above. Â I hope you can come up with something you like for your own creation. Â This part was pretty straight forward, using the simulation to watch a few seconds at a time and check that I liked it.


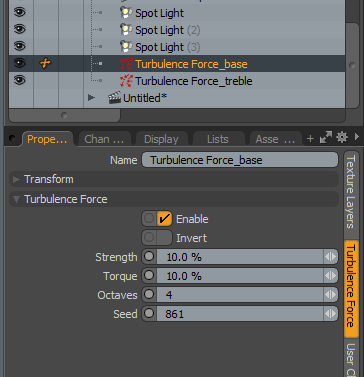
Finally, I wanted more variation to the particles themselves without having to have more motion with the emitter, so I added a couple forces, one to the treble and one to the base track, leaving the midrange to emitted without turbulence. Â The settings I applied with separate seeds for randomness are shown below:
Rendering
On to rendering your now sweet particle system. Â I chose to use sprites for this animation for fast rendering and because I’ve had some issues (I think it is to be fixed in SP1) with particle age shading gradients not working with replicators. Â Anyway, sprites work great and render really fast so here is the sprite setup I’m using for my base-sprites.
![]()
In that sprite setup gradient, the yellow curve is the age size fallup and it falls off to zero size after 3 seconds since my particles cull at 90 frames (3 sec). Â The color burns with age as well so you can pick the colors you want, just remember to set the age to the time in seconds you use for your culling on the particles. Cache a few areas of your simulation so you can render it in preview, otherwise the sprites won’t show in preview. Â With some areas cached, you can setup your colors, timing, test the fades. Â Any changes to your audio cutoffs, you will have to recache the particle simulation to see it in preview again which should be VERY fast for just a few seconds.
I set some spotlights with a slight color around my scene and the point light in the middle of the emitter, I oscillated up and down within the emitter so it would cast shadows out with changing rays. Â To accomplish this I had to enable volumetrics on the point light as the screenshot below.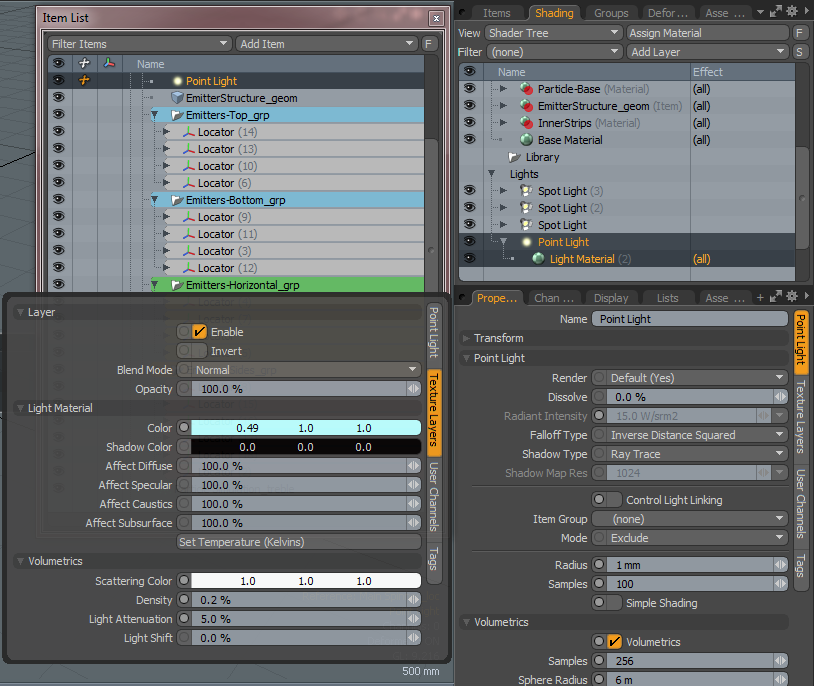
So, that should get you something very close to the animation above or at least helped you with your own particle creations in MODO701. Â I’m loving the new version and have to say, particles are very robust and powerful, I know I’ll be using them on many future projects, so this project was a lot of fun to explore them and the new audio system to see what I could do with it. Â I help the tutorial has helped. Â Enjoy.
