Compositing Modo Render Passes as Image Sequences in Blender
If you use 3D applications for image or animation sequences, most 3D apps can output different layers. Â This tutorial is about using render layers from MODO to be composited in Blender using its node based compositor features. Â Many 3D artists have 3D software with this layer capability but don’t need or use a compositor in their workflow. Â I don’t have a compositor and although most paint packages can do layer overlays, I find them very unfriendly, most cannot script or repeat the compositing set on different images or they simply don’t have the featureset to properly control, edit and manipulate the layers in the composite.
All these reasons led me to explore using Blender for some compositing. Â Blender is a 3D package itself, and while I don’t do any 3D in Blender, because I find MODO to be far superior, Blender is definitely an option to use for some compositing, especially since it is free. So, to get started you will need to render out a set of output layers in your MODO environment. Â I’ve played with all the render outputs and am going to show the ones that I use now to do basic compositing from MODO outputs. Â There are many different layer combinations and more complex solutions you can do with compositing and since I’m no expert with it, I’m going to only cover the basics.
MODO Output Layers
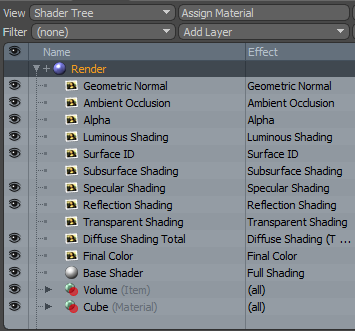
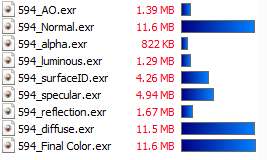
Blender doesn’t seem to support layered EXR files (in V2.69, which has now been fixed in Blender 2.70 thankfully) that contain single channel greyscale layers, so that means separate layers need to be saved out instead of a layered file. Â I still prefer to use EXR16 or EXR32 to get the most range for dynamic ranges but you can use PNG, TGA or even JPG if you don’t expect to make dramatic adjustments. Â The layers I use are outlined here, you can easily add additional layers or turn the outputs on or off.
In order to have the individual layers saved to disk, you have to use the Render Animation option and set the frame or sequence to render out. Â Each frame will get its output layers saved to your individually set file location.
Blender Compositing
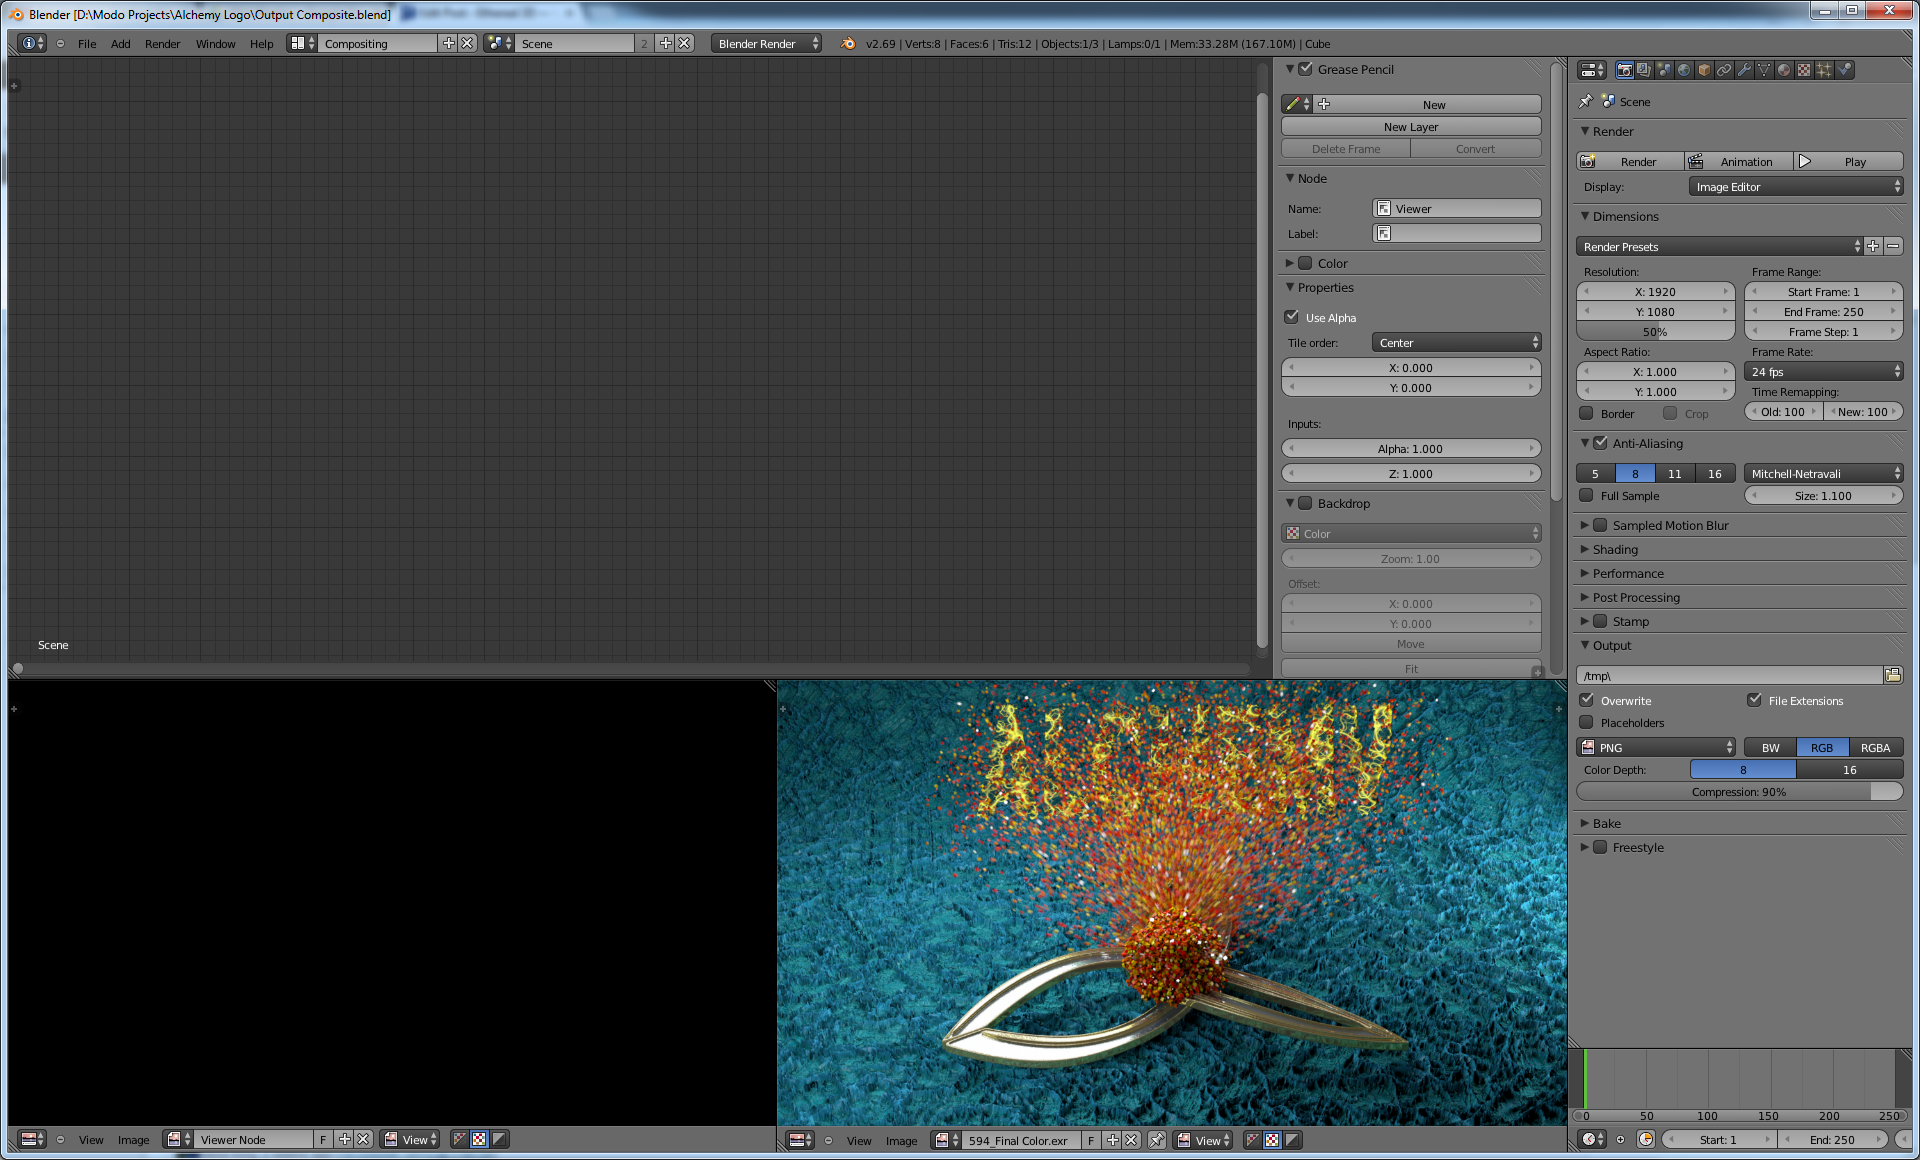
Next, lets switch over to Blender to start the compositing. Â Open Blender and switch to the compositing layer to show the nodes and UV/Image layout below so you have a view output visible. Â That layout looks like this:
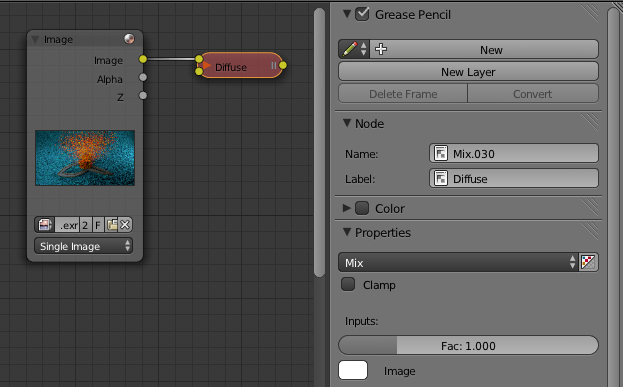
So, you can drag and drop your images into the node space to bring in your layers. Â If you want to keep things organized well, you can add a simple node such as a mix node (Shift-A to add items) and in the properties (under the grease pencil), give that mix node a name to indicate what image layer that node is for. Â To use this node for only its name, you can mute the mix node itself, do this by selecting the node and pressing ‘m’ to mute it out.
Then, you can add your extra image layers to bring in each render output. Â I’ve shown my layout for a simple composite now with several render layers names and connected for the composite.
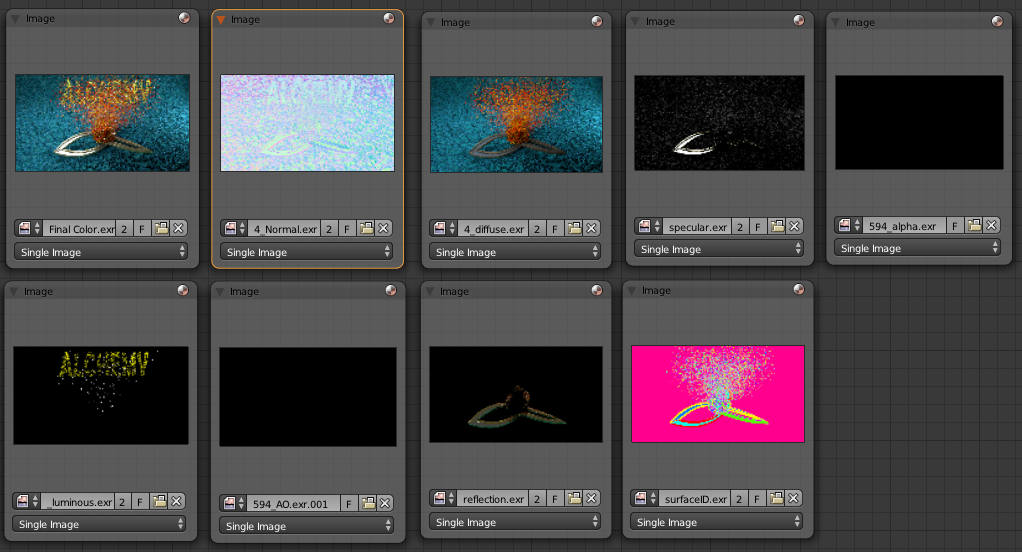
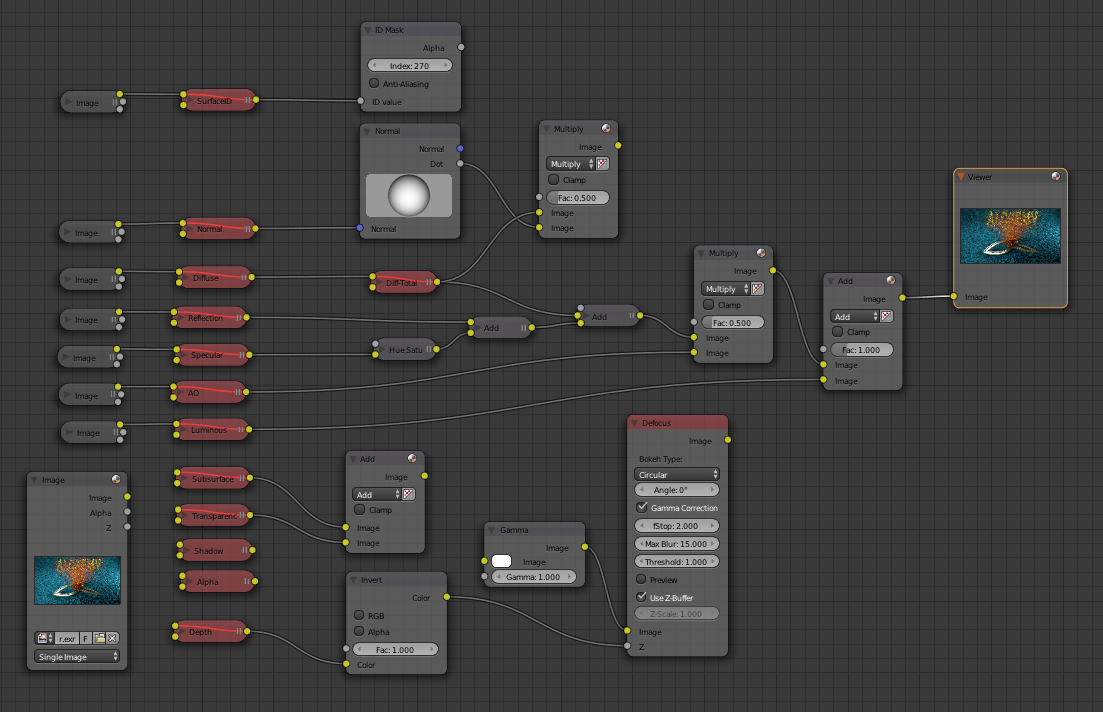
The left side you can see all the render layers, which I’m not using all of them in this composite, but I have nodes ready to connect so I can easily reuse this project for different composites. The actual render layer images are shown above as well.
Layers Mixing
The composite layers are done essentially by adding your lighting passes together with the add mix node. Â This is your simplest composite using diffuse + reflection + specular. Â These 3 combined can be multiplied by your ambient occlusion layer to control the ambient illumination affect. Â You can easily adjust the amount of influence the AO channel has by changing the factor input to the AO mixer node. Then you can add in your illumination channel on top of that combination and you have a basic composite of the render layers.
I’ve got some additional nodes shown in the setup above that you can use for additional layer control. Â A few examples and additional examples are listed below. Â There are many other creative
- Shadow passes can be used to darken or lighten up shadow regions in your diffuse layers
- Normal passes can be combined in to adjust shading direction brightness/contrasts by multiplying it in. Â This can also be used to combine layers against the illumination passes for further shading control.
- SurfaceID passes can be filtered with the ID Mask if thee is a need to make individual surface adjustments
- Depth passes can be used to add depth of field to the resulting composite
- Alpha passes (for the full frame or on individual items) can be used to mask any layer for adjustments as well
If you only need a basic composite, you can see the highlighted render output and nodes below. Â The composite of these layers results in a final output that is nearly identical to the final color pass from the MODO render itself.
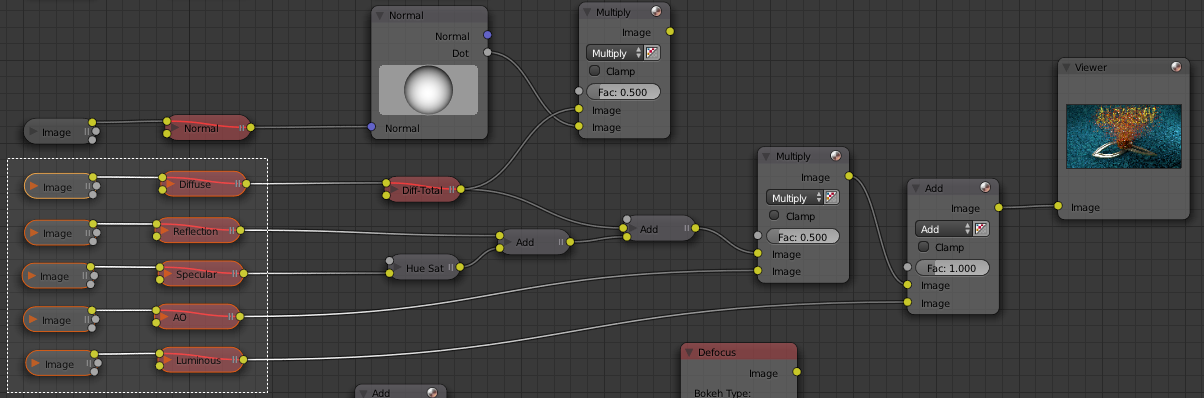
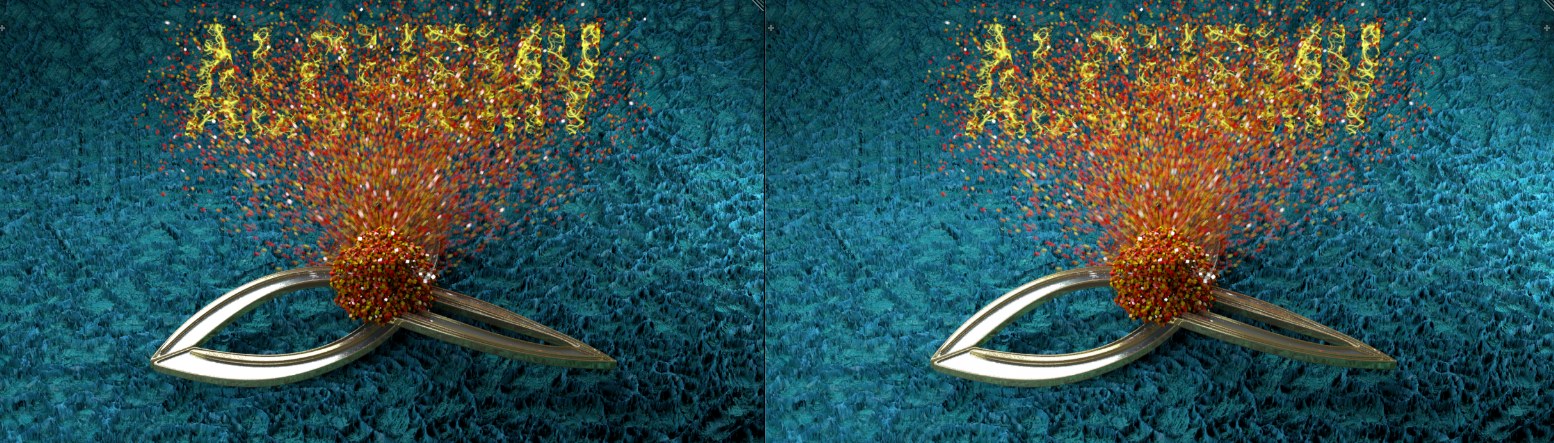
Image Sequences
To manage a composite on a set of image sequences, you can use the exact composite setup as above, you simply need to change the image input items to image sequences and tell Blender the frame ranges of your sequences. Â Set each of the input render layers to use the same start frame and frame range and you should then be able to use Blender animation slider to scrub through the timeline and see the results. Â The beauty now, is that you can add color correction and mixing of the composite with any number of keyframes on any properties you need. Â Simply right click the properties at the frames you need, to add or replace keyframes and you can adjust it over time to composite some very precise changes and corrections in post production without an expensive re-render from MODO.
Set Blenders scene range and then you can simply hit Render-> Animation and in just a few minutes you have a new edited output sequence.

I hope you can make use of this tutorial to get started yourself with compositing with MODO’s render outputs. Â If you are interested in other tutorials, please view our store for more content as well as our free tutorials here. Â I’d sure appreciate if you want to share or mention these tutorials to your own contacts. Â Thanks…